Creating an online IDE for FreeST
FreeST was previously available in two places: RSS and TryIt. RSS was general information and downloads, while the TryIt page was a way of trying FreeST online without the need to install any tools (such as Stack or Haskell).
Recently, we decided to ‘move out’ to GitHub, and thus, create a new page with new and improved features. It was implemented using Jekyll and served through GitHub Pages. The RSS page is now ‘outdated’, but the same cannot be said for the TryIt page. We work around this by adding a link to it in the new website, but it is desirable to have them together so that visitors do not need to toggle between websites.
The general idea is to create a TryIt clone with syntax highlighting and the ability to execute code into FreeST’s new website.
Running code
TryIt has a very simple interface for running code: a text area with syntax highlighting, a button to run, and a (non-editable) text area for execution output.
Executing code is done by sending code to the TryIt server via HTTP POST request and then receiving
its output. We can quickly recreate this via curl
    curl -H "Content-Type: application/json" \
         -d '{"code":"main : ()\nmain = putStrLn \"Hello, World!\""}' \
         -XPOST http://194.117.20.245:5011/run.json
The previous command yields {"result": "Hello, World!\n()\n"}, the pure result of running the
compiler. If any error would be thrown, it should appear here as-is in the
result.
Emulating code execution using JavaScript
JavaScript has a fetch command to execute POST requests, and if we pair it with an HTML element
to hold code, we can easily recreate what the TryIt page does with a few lines of code:
async function executeCode() {
    const code = document.getElementById("code").value;

    const options = {
        method: 'POST',
        headers: {
        'Content-Type': 'application/json'
        },
        body: JSON.stringify({code: code}),
    };

    const response = await fetch("http://194.117.20.245:5011/run.json", options);

    return await response.json();
}
Code editor
One important aspect of Tryit is to behave in a similar fashion to a rudimentary IDE (without any fancy features like auto-complete and error highlighting). How can we replicate this behaviour?
Vanilla HTML, CSS and JavaScript
No way I’m even going to elaborate on this. It would be hellish and unwise to try and create an entire framework just for this case. We’ll follow common sense and search for pre-existing solutions that we can use in the context of Jekyll and GitHub Pages.
CodeMirror

TryIt uses CodeMirror to implement a code editing field. We want to
replicate this field in the new website but fully configured for FreeST. CodeMirror uses npm
(or other dependency managers if you choose so) to install it, however, Jekyll uses Bundle
and not npm. Attempts have been made to merge both under a same project but it becomes too
cumbersome when in combination with GitHub Pages (check here for
more info).
Fortunately, there is a git project that provides CodeMirror with vanilla JavaScript wc-codemirror. With a few lines of code, we can embbed a JavaScript editor into any page:
<wc-codemirror mode="javascript"></wc-codemirror>

<script type="module" src="https://cdn.jsdelivr.net/gh/vanillawc/wc-codemirror@1/index.js"></script>
<script type="module" src="https://cdn.jsdelivr.net/gh/vanillawc/wc-codemirror@1/mode/javascript/javascript.js"></script>
There is catch however: custom syntax highlighting is only available to the original CodeMirror, not the vanilla JavaScript one. Which means that we either abandon syntax hightlighting alltogether or settle for Haskell’s one. Neither of these options seem desirable.
Ace

Ace is (similarly to CodeMirror) a web component for a code editor. Unlike CodeMirror, it does not require any other frameworks, so we can embbed it directly into HTML. The following code is a small editor for JavaScript:
<style type="text/css" media="screen">
    #editor {
        height: 20em;
        font-size: inherit;
    }
</style>

<div id="editor">
function foo(items) {
    var x = "All this is syntax highlighted";
    return x;
}
</div>

<script src="https://cdnjs.cloudflare.com/ajax/libs/ace/1.24.1/ace.js" type="text/javascript" charset="utf-8"></script>
<script>
    var editor = ace.edit("editor");
    editor.setTheme("ace/theme/monokai");
    editor.session.setMode("ace/mode/javascript");
</script>
Ace also has the option of creating your own themes, syntax highlighting and IDE-like features. The good news is it relies just on JavaScript to implement. It uses a structure very similar to what was already done for FreeST’s syntax highlighting extension in VSCode (you can check it in my portfolio page)
Building the page
To build this page we’ll create a new Jekyll layout tryit.html that extends the default layout
and contains our editor, a Run button and an output terminal to show the program result.
---
layout: default
---

<h1>FreeST Online</h1>

<br>

<div id="editor"></div>

<div id="button-container">
    <button id="run" class="btn btn-outline" onclick="executeCode()">Run</button>
</div>

<div id="terminal" class="scroll-area">
    <pre id="terminal-content" style="margin-top: 0;">$</pre>
</div>
Editor
As previously said, we’ll be using Ace to implement a code editor with custom syntax highlighting. At its core, Ace uses the same logic as the VSCode’s syntax highlighting extension: a set of regex rules that identify pieces of text as variables, types, etc.
To give a short explanation, imagine a regex but instead of a single pattern, you are able
to create many patterns and connect them to capture more complex strucutres. For example,
starting in rule start, we can match another pattern #types which then identifies
functional types Int, Char, Bool and String with the tag support.type.freest,
or session types Skip and End with the tag support.type.session.freest. Tags are
then used by the theme to pick which color the text should be. This is only an excerpt,
if you want to check it fully see here.
this.$rules = {
    'start' : [
        ...
        { include: '#types' },
        ...
    ],

    '#types': [
        {
            token: 'support.type.freest',
            regex: /\b(Int|Char|Bool|String)\b/
        },
        {
            token: 'support.type.session.freest',
            regex: /\b(Skip|End)\b/
        }
    ],
}
Now it’s a simple case of assembling the Ace editor just like the example and set the syntax highlighting to our custom FreeST mode.
<script src="https://cdnjs.cloudflare.com/ajax/libs/ace/1.24.1/ace.js" integrity="sha512-qoTuZAi37gnhWcmNJlzdcWsWlUnI+kWSAd4lGkfNJTPaDKz5JT8buB77B30bTCnX0mdk5tZdvKYZtss+DNgUFQ==" crossorigin="anonymous" referrerpolicy="no-referrer"></script>
<script src="/scripts/mode-freest.js"></script>
<script>
    var editor = ace.edit("editor");
    editor.setTheme("ace/theme/chrome");

    var FreestMode = ace.require("ace/mode/freest").Mode;
    editor.session.setMode(new FreestMode());

    /* Hello world sample, div formats multiline into a single line
        so we set it manually here and put the cursor in the start*/
    editor.setValue('main : ()\nmain = putStrLn "Hello, World!"', -1);
</script>
Notice that instead of leaving placeholder code in the HTML, we set it manually in the script. Why is this? If we put it in HTML we lose paragraphs (for some reason) and it changes to a single line, while through JS we can preserve this.
Output terminal
I have to admit, I’m not the best at creating something pretty nor I have the patience to design it with CSS and HTML. To avoid any of these ‘barriers’ – if you choose to call them so – we just copied the old TryIt terminal.
Execution
Execution is triggered on the click of a button. This button takes text from the editor and makes an
HTTP POST request to the same server hosted at FCUL. Once again, we just took a preexisting
button from Minimal Mistakes (the Jekyll theme of our website) and added the respective code
to request code execution. While the request is being processed, we display a simple
Running... message and when we receive the result, we display it as-is in the terminal. This
way it’s just like using FreeST on a terminal.
<script>
    async function executeCode() {
        /* HTML ELEMENTS */
        /*const editor = document.getElementById("editor").value;*/
        var terminal = document.getElementById("terminal-content");

        /* WAITING */
        terminal.innerHTML = "Running...";

        /* INPUT */
        const code = editor.getValue();

        /* EXECUTION REQUEST */
        const options = {
            method: 'POST',
            headers: {
            'Content-Type': 'application/json'
            },
            body: code /* JSON.stringify({code: code}), */
        };

        const response = await fetch("https://85.240.106.6:8080/freest/run", options);

        const result = await response.text();

        /* OUTPUT */
        terminal.innerHTML = result;
    }
</script>
If at some time in the future we decide to change our backend in any way, we can simply change this function as needed. Two realistic scenarios are: if we change the REST protocol, and if the server changes IP.
Final result
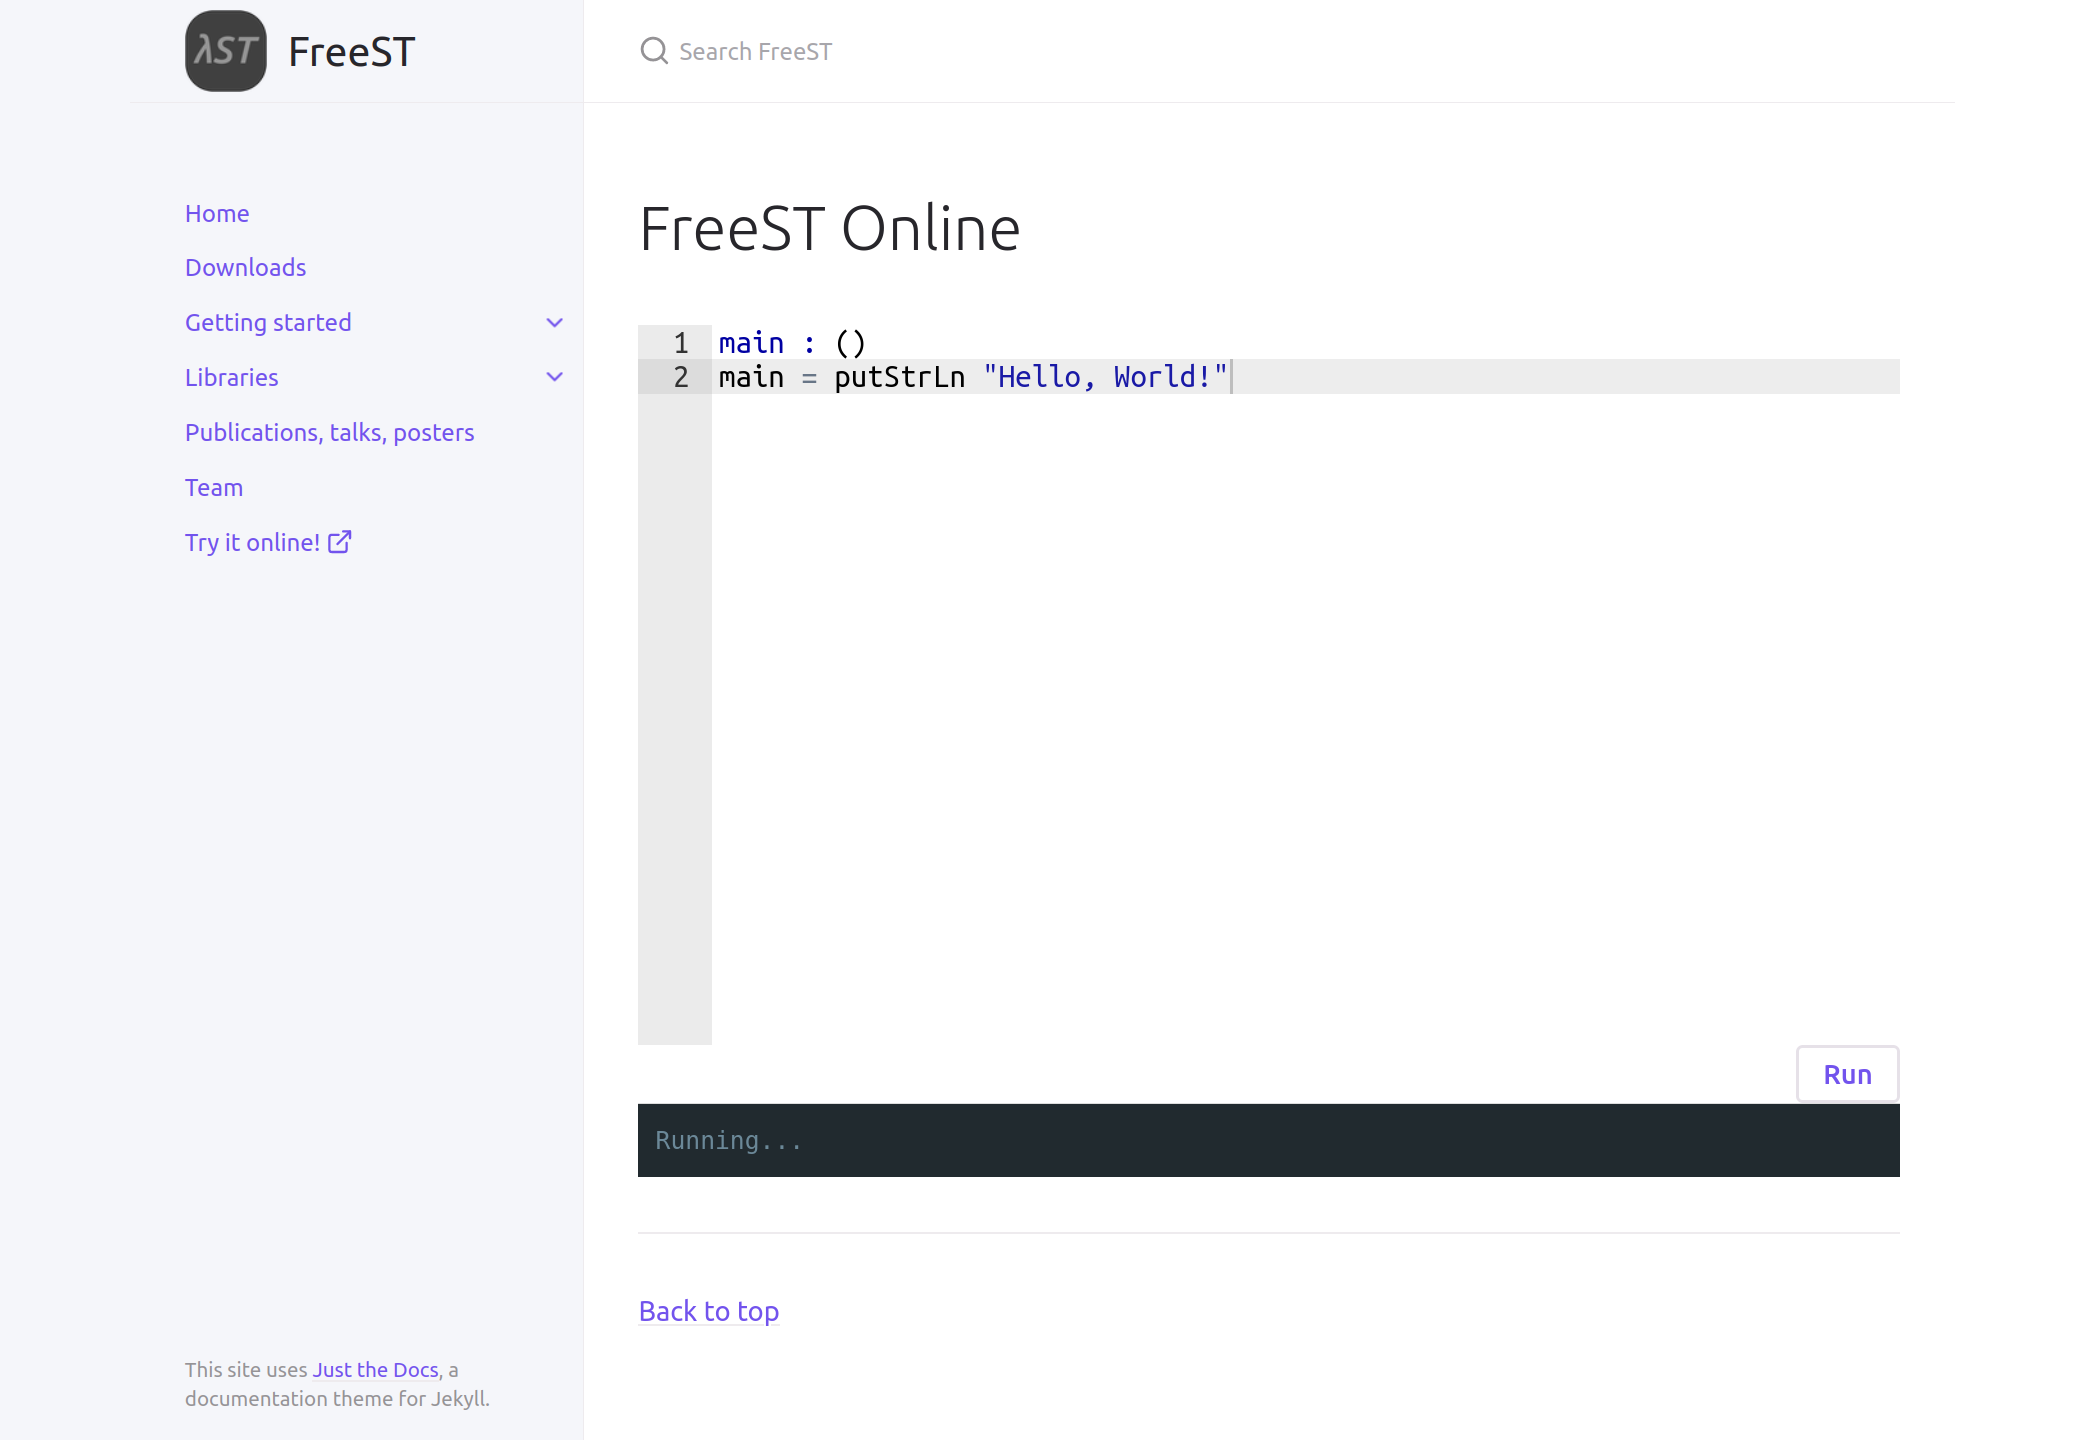
In the end we have a nice online editor to show everyone how FreeST is amazing without asking them to first install Haskell, then Stack, then download FreeST, install Freest … This is our version of plug-and-play for languages: try-it, test its features and take it to the limit, if you like it you can consider installing it. Here’s the final result:

Check it out through this link.
Good news, bad news
Queue the music and the baloons, it’s done and working… or is it? After deploying it to GitHub
Pages, the example is stuck in Running.... A closer inspection reveals the culprit:

GitHub Pages hosts using HTTPS, however our FreeST backend runs on HTTP. It’s unsafe (and forbidden by default) to make requests from safe to unsafe sources, and thus our implementation is dead in the water.
The only solution to our problem is to change our backend server to HTTPS. For now, we just hid the page from the navigation bar on the left but it is still there. If you wish to bruteforce it, you can disable your browser’s security to allow the request to be made and use the editor.
